The following docker-compose.yml file setups a local WordPress docker instance alongside a MySql server and an Adminer web app which can be used as an alternative to PhpMyAdmin.
version: '3.9'
services:
  wp_mysql:
    image: mysql:latest
    container_name: wp_mysql
    command: mysqld --character-set-server=utf8mb4 --collation-server=utf8mb4_unicode_ci --default-authentication-plugin=mysql_native_password
    restart: on-failure
    environment:
      MYSQL_ROOT_PASSWORD: secret
      MYSQL_DATABASE: wp_db
      MYSQL_USER: wp_db_user
      MYSQL_PASSWORD: wp_db_user_pass
    ports:
      - "6033:3306"
    volumes:
      - wp_mysql_volume:/var/lib/mysql

  wp_app:
    image: wordpress:latest
    environment:
      WORDPRESS_DB_HOST: wp_mysql
      WORDPRESS_DB_USER: wp_db_user
      WORDPRESS_DB_PASSWORD: wp_db_user_pass
      WORDPRESS_DB_NAME: wp_db
    volumes:
      - ./wp-data:/var/www/html/
    restart: on-failure
    ports:
      - 8081:80
  adminer:
    image: adminer
    restart: on-failure
    ports:
      - 8082:8080
volumes:
  wp_mysql_volume:
Save the above file on your disk, and from within the command line, run the following command: docker-compose up (assuming you have already installed docker-compose and docker on your system).
After that, you can head to the following URL http://localhost:8081/ to install WordPress and use it later on. Using this URL http://localhost:8082/, you will be able to access Adminer to inspect or edit the newly created MySQL database. For Adminer, use the same credentials you have specified in the docker-compose file. 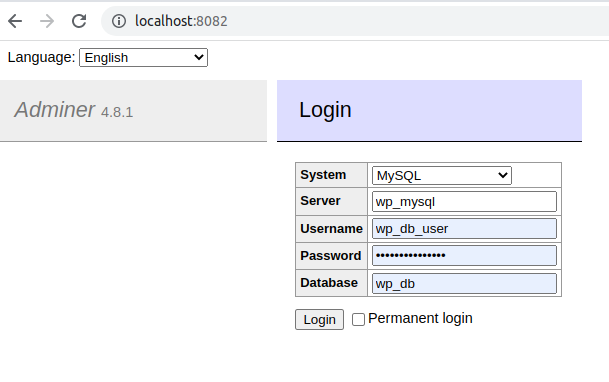
Note we are using the name of the MySQL service here in the Server field!
Happy coding 🙂
Leave a Reply